This tutorial assumes your
knowledge of Corel Paintshop Pro
and should work well with all versions.
I created this tutorial with my own ideas
and as such do not copy and claim as your own.
Links are current at time of creation of this tutorial.
I will try to keep them up to date as time goes on.
Feel free to email me if you think
any information is in error.
Any similarities to any other tutorial is
purely coincidental
-Princesa 20'
Supplies used:
Drop shadow
V4, H4, Op70, B15
V4, H4, Op70, B15
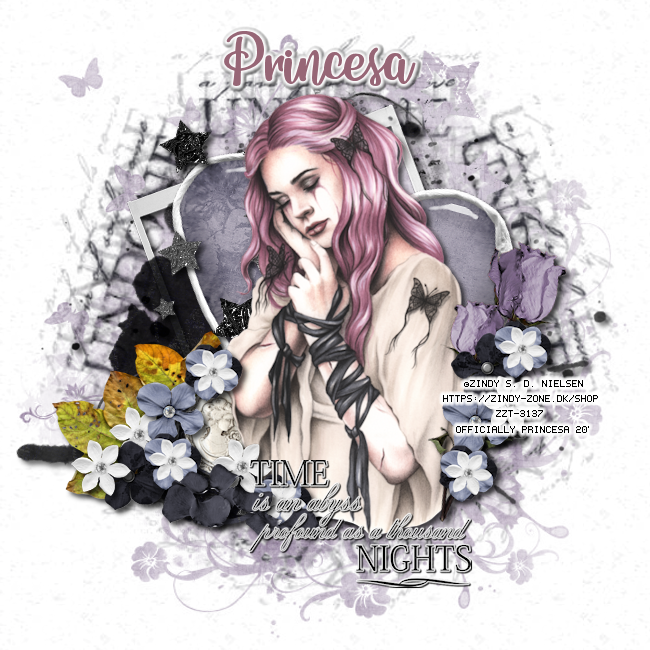
Lets begin:
Open new 650x650 transparent canvas
c/p frame 1
resize 75%
see example for placement of this and all following elements
use magic wand and click inside frame
selections, modify, expand by 10
add new raster layer
place paper 2 into selection
invert, delete
place tube, arrange to your liking
delete
select none
c/p element 24
resize 35%
use eraser tool
erase stems that are sticking out or leave as is
rotate right 45 degrees
adjust, sharpen
duplicate, mirror
c/p element 21
resize 20%
duplicate, mirror, duplicate
c/p element 13 and 14
resize both 35%
c/p element 22
resize 20%
c/p element 3
resize 30%
c/p element 2
resize 15 %
c/p 16 and 7
resize 15%
add new raster layer
select all
c/p paper 4 into selection
select none
load mask AKK-10
merge group
add new raster layer
select all
c/p paper 2 into selection
select none
load mask DBV 113
merge group
add all drop shadows
add copyright info, add your name
merge all visible
save as a png
you are done
thank you for trying my tutorial
-Princesa
Shaz
Thank you


select all
c/p paper 4 into selection
select none
load mask AKK-10
merge group
add new raster layer
select all
c/p paper 2 into selection
select none
load mask DBV 113
merge group
add all drop shadows
add copyright info, add your name
merge all visible
save as a png
you are done
thank you for trying my tutorial
-Princesa
Shaz
Thank you

Kittie
Thank you